전편에 이어서.. 6장도 합니다. 대충 해야지..
이거 내가 왜시작했지...
여러분 해석이 개판입니다. 요약만 보세요..
6 Frameworks in Action
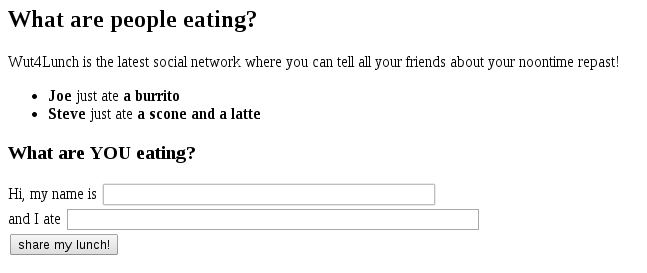
For each framework let's take a look at making an app called wut4lunch, a social network to tell the whole internet what you ate for lunch. Free startup idea right there, totally a gamechanger. The application will be a simple interface that allows users to post what they had for lunch and to see a list of what other users ate. The home page will look like this when we're done.
각각의 프레임워크들을 이용해여 wut4lunch (점심머먹지?) 앱을 만들어보자. 인터넷의 사람들이 니가 뭘 점심으로 먹을 지 말해주는 SNS이다. 자, 창업 아이디어가 바로 여기있다. 완전히 gamechanger 이다(?). 이 어플리케이션은 유저가 그들이 점심으로 무엇을 먹었는지 포스팅하고, 다른 사람들이 먹은 리스트를 볼수 있는 간단한 인터페이스를 가진다. 우리가 작업을 끝내면 아래와 같이 보일거다.
6.1 Demo App with Flask
가장 짧은 구현이다. 파이썬 34줄과, 22줄짜리 진자 템플릿을 이용했다. 처음으로, 우리가 ORM을 이용해서 우리의 app을 시작하는 것처럼, 우리는 몇가지 잡일을 좀 해야한다.
from flask import Flask # For this example we'll use SQLAlchemy, a popular ORM that supports a # variety of backends including SQLite, MySQL, and PostgreSQL from flask.ext.sqlalchemy import SQLAlchemy app = Flask(__name__) # We'll just use SQLite here so we don't need an external database app.config['SQLALCHEMY_DATABASE_URI'] = 'sqlite:///test.db' db = SQLAlchemy(app)
Now let's take a look at our model, which will remain almost the same for our other two examples as well.
이제 우리의 모델을 살펴보자. 다른 두가지의 예에도 이것은 거의 비슷하게 나올것이다.
class Lunch(db.Model): """A single lunch""" id = db.Column(db.Integer, primary_key=True) submitter = db.Column(db.String(63)) food = db.Column(db.String(255))
Wow, that's pretty easy. The hardest part was finding the right SQLAlchemy data types and picking a length for our String fields in the database. Using our models is also extremely simple, thanks to the SQLAlchemy query syntax we'll see later.
와 이건 엄청나게 쉽다. 가장 어려운 부분은 SQLAlchemy 데이터 타입을 정확하게 쓰고, 우리의 데이터베이스를 위해서 문자열의 길이를 구하는 부분이었다. 우리의 모델이 엄청나게 간단하기때문에 SQLAlchemy 쿼리문법에 감사하자. 나중에 또 봐요~
Building our submission form is just as easy. After importing Flask-WTForms and the correct field types, you can see the form looks quite a bit like our model. The main difference is the new submit button and prompts for the food and submitter name fields.
우리의 제출 form을 만드는 것 또한 쉽다. Flast-WTForms를 이식한 후에, 적당히 타입을 맞추면, 우리는 우리 모델과 정말 비슷한 모양이 된다는걸 알 수 있다. 주요한 차이는 이름과 음식을 제출하는 부분에 새로운 확인버튼과 입력부분이 생겼다는 것이다.
The SECRET_KEY field in the app config is used by WTForms to create CSRF tokens. It is also used by itsdangerous (included in Flask) to sign cookies and other data.
SECRET_KEY 속성은 WTForms를 이용해 CSRF토큰을 사용해서 만들었다. 이것은 itsdangerous(플라스크에 포함되어있음) 를 이용해서 쿠키나 데이터를 확인할때 쓰인다.
from flask.ext.wtf import Form from wtforms.fields import StringField, SubmitField app.config['SECRET_KEY'] = 'please, tell nobody' class LunchForm(Form): submitter = StringField(u'Hi, my name is') food = StringField(u'and I ate') # submit button will read "share my lunch!" submit = SubmitField(u'share my lunch!')
Making the form show up in the browser means the template has to have it. We'll pass that in below.
꼭 있어야죠~, 브라우저애서 보여질 폼 부분을 만듭니다. 아래에 보여줄께요.
from flask import render_template @app.route("/") def root(): lunches = Lunch.query.all() form = LunchForm() return render_template('index.html', form=form, lunches=lunches)
Alright, what just happened? We got a list of all the lunches that have already been posted with Lunch.query.all(), and instantiated a form to let the user post their own gastronomic adventure. For simplicity, the variables are passed into the template with the same name, but this isn't required.
좋습니다, 어떻습니까? 우린 Lunch.query.all()을 이용해서 모든 점심밥을 다 모았네요, 또 유저들이 그들의 위장들의 대모험을 포스팅 할수 있게 하는 폼도 인스턴스화 시켰습니다. 간단히 말해서, 템플릿에 어려 같은 이름으로 변수들이 들어갔지만, 필요가 없네요.
about your noontime repast!</p>
Here's the real meat of the template, where we loop through all the lunches that have been eaten and display them in a <ul>. This almost identical to the looping example we saw earlier.
여기 템플릿에 진짜 먹을것이 있다. 우리는 반복적으로 <ul>안에 그들이 먹은 모든 점심을 나타냈다. 이것은 우리가 앞에서 보여준 루프와 거의 동일하다.
<ul> {% for lunch in lunches %} <li><strong>{{ lunch.submitter|safe }}</strong> just ate <strong>{{ lunch.food|safe }}</strong> {% else %} <li><em>Nobody has eaten lunch, you must all be starving!</em></li> {% endfor %} </ul> <b>What are YOU eating?</b> <form method="POST" action="/new"> {{ form.hidden_tag() }} {{ form.submitter.label }} {{ form.submitter(size=40) }} <br/> {{ form.food.label }} {{ form.food(size=50) }} <br/> {{ form.submit }} </form> </html>
The <form> section of the template just renders the form labels and inputs from the WTForm object we passed into the template in the root() view. When the form is submitted, it'll send a POST request to the /new endpoint which will be processed by the function below.
템플릿의 <form>섹션은 root() 뷰 안에있는 템플릿을 이용해 WTFrom 객체로 label과 input들을 그려준다. form이 입력되었을때, 아래에서 나오는 함수에 대해 POST요청을 /new 지점에 보내게 된다.
from flask import url_for, redirect @app.route(u'/new', methods=[u'POST']) def newlunch(): form = LunchForm() if form.validate_on_submit(): lunch = Lunch() form.populate_obj(lunch) db.session.add(lunch) db.session.commit() return redirect(url_for('root'))
After validating the form data, we put the contents into one of our Model objects and commit it to the database. Once we've stored the lunch in the database it'll show up in the list of lunches people have eaten.
데이터 검증이 끝나면, 우리는 내용을 우리의 모델객체에 담고, 데이터베이스에 입력하게 된다. 한번 우리의 점심을 데이터베이스에 입력하면, 그것은 사람들이 먹은 점심 목록에 포함된다.
if __name__ == "__main__": db.create_all() # make our sqlalchemy tables app.run()
Finally, we have to do a (very) little bit of work to actually run our app. Using SQLAlchemy we create the table we use to store lunches, then start running the route handlers we wrote.
6.2 Demo App with Django
On to the form system. Unlike Flask, Django has a built-in form system that we can use. It looks much like the WTForms module we used in Flask with different syntax.
폼 구조를 보자. 플라스크와는 다르게 장고는 우리가 쓸수있는 이미 내장 폼구조가 있다. 이건 우리가 플라스크에서 다른 문법을 사용했던 WTForms 모듈과 비슷하게 생겼다.
from django import forms from django.http import HttpResponse from django.shortcuts import render, redirect from .models import Lunch # Create your views here. class LunchForm(forms.Form): """Form object. Looks a lot like the WTForms Flask example""" submitter = forms.CharField(label='Your name') food = forms.CharField(label='What did you eat?')
Now we just need to make an instance of LunchForm to pass in to our template.
이제, 우리는 우리의 템플릿을 보여줄, LunchForm 인스턴스를 생성만 하면된다.
lunch_form = LunchForm(auto_id=False) def index(request): lunches = Lunch.objects.all() return render( request, 'wut4lunch/index.html', { 'lunches': lunches, 'form': lunch_form, } )
The render function is a Django shortcut that takes the request, the template path, and a context dict. Similar to Flask's render_template, but it also takes the incoming request.
render함수는 dict내용과, 템플릿 경로, 요청을 처리해주는 지름길이다. 플라스크의 render_templete와 유사하지만, 이것은 요청도 처리할 수 있다.
def newlunch(request): l = Lunch() l.submitter = request.POST['submitter'] l.food = request.POST['food'] l.save() return redirect('home')
Saving the form response to the database is different, instead of using a global database session Django lets us call the model's .save() method and handles session management transparently. Neat!
데이터베이스에 반응하여 폼을 저장하는것은 좀 다르다. 글로벌한 데이터베이스를 사용하는 대신에, 장고 세션은 모델에 있는 .save() 메소드를 호출하도록하고, 세션 관리자는 보이지 않는다. 우왁!
Django provides some nice features for us to manage the lunches that users have submitted, so we can delete lunches that aren't appropriate for our site. Flask and Pyramid don't provide this automatically, and not having to write Yet Another Admin Page when making a Django app is certainly a feature. Developer time isn't free! All we had to do to tell Django-admin about our models is add two lines towut4lunch/admin.py.
장고는 유저들이 점심을 제출한것을 관리하기위한, 몇기자 좋은 기능들을 제공하는데, 우리는 그들의 점심이 우리 사이트랑 적절하지 않으면 지울 수 있다. 플라스크와 피라미드는 이런것을 자동화해서 제공하지 않고, 특별히 다른 admin페이지 작성할만한 것을 가지고 있지도 않다. 개발자들의 시간은 공짜가 아니다! 우리는 우리 모델에 관한 장고-admin 이 wut4lunch/admin.py에 두 라인만 추가하면 된다는것을 꼭 말해야 한다!
admin.site.register(Lunch)
Bam. And now we can add and delete entries without doing any extra work.
Lastly, let's take a look at the differences in the homepage template.
빰! 이제 우리는 어떤 야근도 없이, 추가하고 지울 수 있다. 마지막으로, 우리는 홈페이지 템플릿의 차이를 살펴보자.
<ul> {% for lunch in lunches %} <li><strong>{{ lunch.submitter }}</strong> just ate <strong>{{ lunch.food }}</strong></li> {% empty %} <em>Nobody has eaten lunch, you must all be starving!</em> {% endfor %} </ul>
Django has a handy shortcut for referencing other views in your pages. The url tag makes it possible for you to restructure the URLs your application serves without breaking your views. This works because the url tag looks up the URL of the view mentioned on the fly.
장고는 우리의 페이지를 다른 방법으로 보여주는 쉬운 지름길이 있다. url태그를 이용하면, 우리가 보는 화면을 망가뜨리지 않고 당신의 어플리케이션이 URL을 재구성해서 제공하는것이 가능하다. 이것은 url태그가 즉석에서 화면의 URL을 찾아내기 때문에 가능하다.
<form action="{% url 'newlunch' %}" method="post"> {% csrf_token %} {{ form.as_ul }} <input type="submit" value="I ate this!" /> </form>
The form is rendered with different syntax, and we need to include a CSRF token manually in the form body, but these differences are mostly cosmetic.
form은 다른 문법으로 그려지는데, 우리는 CSRF토큰을 수동으로 이용할 필요가 있지만, 이것들의 차이는 거의 예쁘게 꾸미는 부분이다.
6.3 Demo App with Pyramid
{{ or {% for control structures and conditionals.The form rendering is slightly more verbose in Pyramid because thepyramid_simpleform doesn't have an equivalent to Django forms' form.as_ulfunction, which renders all the form fields automatically.
form 렌더링은 좀더 장황하게 보인다. 왜냐하면, pyramid_simpleform 은 장고의 form.as_ul 함수처럼 모든 form 속성을 자동으로 그려주는 것 같은 기능을 하는게 없다.
Now let's see what backs the application. First, we'll define the form we need and render our homepage.
이제 우리는 어플리케이션의 뒷단은 어떤지 볼것이다. 첫번쨰로, 우리는 우리의 홈페이지를 그려주기 위해, form을 정의 할 것이다.
# pyramid_wut4lunch/views.py class LunchSchema(Schema): submitter = validators.UnicodeString() food = validators.UnicodeString() @view_config(route_name='home', renderer='templates/index.pt') def home(request): lunches = DBSession.query(Lunch).all() form = Form(request, schema=LunchSchema()) return {'lunches': lunches, 'form': FormRenderer(form)}
The query syntax to retrieve all the lunches is familiar from Flask because both demo applications use the popular SQLAlchemy ORM to provide persistent storage. In Pyramid lets you return your template's context dictionary directly instead of needing to call a special render function. The @view_config decorator automatically passes the returned context to the template to be rendered. Being able to skip calling therender method makes functions written for Pyramid views easier to test, since the data they return isn't obscured in a template renderer object.
모든 점심들을 불러오기 위한 쿼리 문법은 플라스크와 비슷해보인다. 이는 데모어플이 저장을 위해서 대중적인 SQLAlchemy ORM을 제공하기 때문이다. 피라미드에서는 , 특별한 render 함수를 호출하는 대신에 바로 당신의 내용이 담긴 템플릿 딕셔너리를 반환해 줍니다. @view_config 데코레이터가 자동으로 그려진 내용을 반환해 줍니다. render메쏘드를 호출하는것을 생략 할 수 있는것은 피라미드의 뷰에서 함수를 만들고 테스트하는것을 더 쉽게 해줍니다.
@view_config(route_name='newlunch', renderer='templates/index.pt', request_method='POST') def newlunch(request): l = Lunch( submitter=request.POST.get('submitter', 'nobody'), food=request.POST.get('food', 'nothing'), ) with transaction.manager: DBSession.add(l) raise exc.HTTPSeeOther('/')
Form data is easy to retrieve from Pyramid's request object, which automatically parsed the form POST data into a dict that we can access. To prevent multiple concurrent requests from all accessing the database at the same time, the ZopeTransactions module provides context managers for grouping database writes into logical transactions and prevent threads of your application from stomping on each others' changes, which can be a problem if your views share a global session and your app receives a lot of traffic.
폼 데이터는 피라미드의 우리가 접근한 dict안에 POST를 이용해 자동적으로 담아진 요청 객체로부터 검색하기가 쉽다. 여러개의 요청이 동시에 발생해 데이터베이스에 동시에 접근하는 것을 막기 위해, ZopeTransactions 모듈이 데이터베이스를 그룹화하여 논리적인 트랜잭션으로 써서, 여러명의 수정을 합쳐서 뭉개지는것을 막기 위한 context manager를 제공한다.
7 Summary
Flask is great for developers working on small projects that need a fast way to make a simple, Python-powered web site. It powers loads of small one-off tools, or simple web interfaces built over existing APIs. Backend projects that need a simple web interface that is fast to develop and will require little configuration often benefit from Flask on the frontend, like jitviewer which provides a web interface for inspecting PyPy just-in-time compiler logs.
플라스크는 파이썬을 이용해 빠르게 간단하고 작은 프로젝트를 개발하는 개발자들에게 아주 좋다. 하나의 간단한 도구만 가지고 구동이 가능하며, 기존의 API를 가지고 간단한 웹 인터페이스를 만들 수 있다. 백엔드 프로젝트에서는 간단한 웹인터페이스가 빠르게 개발 가능하고, 적은 설정만 요구하는 플라스크의 프론트 엔드가 이득을 줄 수 있다. jitviewer같이 PyPy 를 통해 실시간 컴파일러 로그를 볼수 있는 웹 인터페이스 말이다.
All three frameworks came up with a solution to our small list of requirements, and we've been able to see where they differ. Those differences aren't just cosmetic, and they will change how you design your product and how fast you ship new features and fixes. Since our example was small, we've seen where Flask shines and how Django can feel clunky on a small scale. Pyramid's flexibility didn't become a factor because our requirements stayed the same, but in the real world new requirements are thrown in constantly.
이 세가지 프레임워크를 우리의 작은 요구에 맞춘 솔루션을 통해서 알아보았고, 우리는 어떻게 그것들이 다른지 보았다. 세가지의 다른점은 그저 시각적인 부분이 아니라, 그들은 당신의 생산물을 어떠헥 디자인 할것인지, 얼마나 빠르게 당신의 기능들과 수정들을 출시 해 낼 수 있는지 에도 차이가 있었다. 우리의 예제가 작아서, 우리는 플라스크가 좋아보이고, 장고가 작은 규모에서는 투박하게 느껴진다. 우리의 요구가 계속 일정했기 때문에, 피라미드의 유연성은 와닿지 않았다. 하지만 실제 세계에서는 새로운 요구사항이 지속적으로 전달된다.
7.1 Credits
Logos in the title image are from the Flask Django and Pyramid project web sites.
This article owes many thanks to its reviewers, Remy DeCausemaker, Ross Delinger, and Liam Middlebrook, for tolerating many early drafts.
In its current form this article incorporates comments and corrections from Adam Chainz, bendwarn, Sergei Maertens, Tom Leo, and wichert. (alphabetical order)
크레딧은 해석하지 않았습니다...
결국 저는 플라스크로 프로젝트를 하는것으로 결정했습니다.
뭐 별거 있겠어...? 간단하게 하자.. 간단하게...
'Programming > Python' 카테고리의 다른 글
| Google HashCode 나갔던 이야기 - 1 (0) | 2020.02.26 |
|---|---|
| 딥마인드의 알파스타가 인간과 비슷한 조건에서 그랜드마스터를 달성했습니다. (0) | 2019.11.01 |
| 웹서버를 사용하기 위해 어떤 프레임워크를 고를 것인가? (0) | 2015.06.29 |
